
Table of Contents
Open Table of Contents
- Introduction
- Basic Types: The Foundation
- Interfaces: Defining Structures
- Classes: OOP in TypeScript
- Async/Await: The Most Important Pattern
- Error Handling
- Zod: Runtime Validation (Like Pydantic)
- Module System
- Advanced Patterns for Security Tools
- Best Practices
- Essential Libraries
- Conclusion
- Resources
Introduction
If you’re a Python developer wondering “Why should I learn TypeScript?”, this article is for you.
As a cybersecurity professional, I faced a problem: I wanted to build an MCP (Model Context Protocol) server so AI agents (like Claude, GPT-4, or local models) could execute security tools like nuclei and nmap.

While Python is the king of scripting and AI research, TypeScript is becoming the standard for AI engineering and modern tooling. The official MCP SDK is in TypeScript, and frameworks like LangChain.js or Vercel AI SDK are pushing the boundaries of what’s possible in the browser and edge.
This article documents my journey learning TypeScript from a Python perspective, with security-focused examples.
Why TypeScript for Red Team & AI Engineering?
- Web Pentesting & Automation: Playwright and Puppeteer are native to Node.js. Writing complex browser automation for scraping or vulnerability scanning is often more robust in TypeScript than Selenium/Python.
- AI Agent Development: The JavaScript ecosystem for AI (LangChain.js, Vercel AI SDK) is huge. Building agents that run in the browser or on the edge (Cloudflare Workers) requires TS.
- MCP SDK: The standard protocol for LLMs to interact with external tools has first-class TypeScript support.
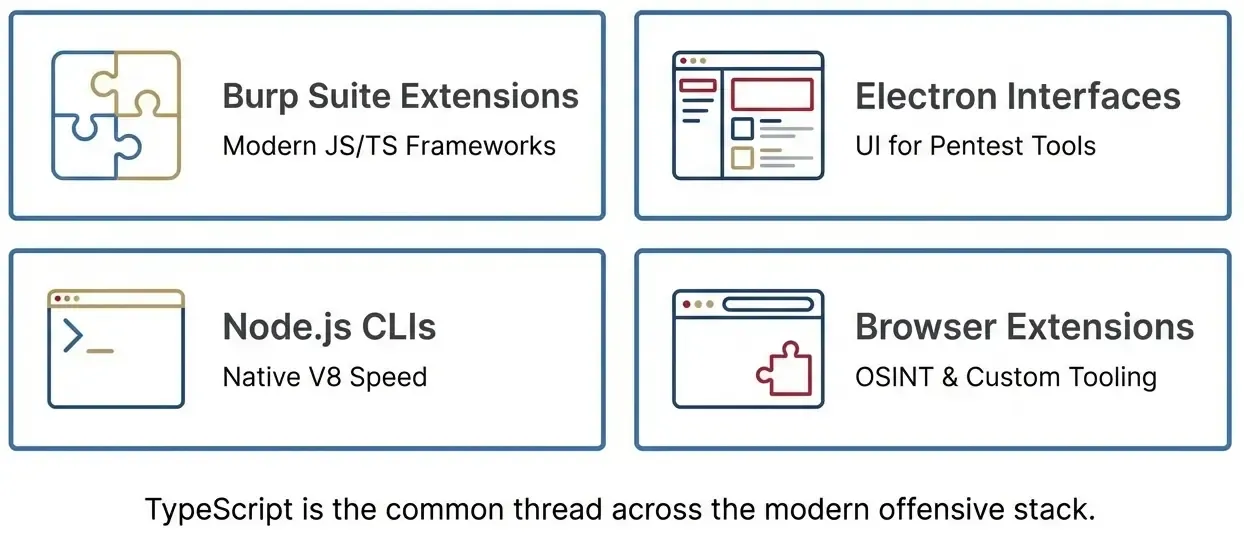
- Burp Extensions: Beyond Java, you can use TypeScript with modern frameworks.
- Electron Apps: Many modern pentesting tools use web technologies.
- Zod: Runtime data validation that outperforms Pydantic in speed and developer experience.
Basic Types: The Foundation
Python vs TypeScript: Basic Syntax
The most important difference: Python has optional type hints, TypeScript enforces them at compile time.
# Python - Type hints (optional, not enforced at runtime)
target: str = "https://example.com"
port: int = 443
is_vulnerable: bool = False

# This does NOT raise an error in Python, just a linter warning
port = "not a number"  # 😱 Runtime accepts this
// TypeScript - Required types, verified at compile time
let target: string = "https://example.com";
let port: number = 443;
let isVulnerable: boolean = false;
// This causes a COMPILE ERROR - code won't run
port = "not a number"; // ❌ Error: Type 'string' is not assignable to type 'number'Arrays
# Python
open_ports: list[int] = [22, 80, 443]
hosts: list[str] = ["10.0.0.1", "10.0.0.2"]
// TypeScript - two equivalent forms
let openPorts: number[] = [22, 80, 443];
let hosts: Array<string> = ["10.0.0.1", "10.0.0.2"];Interfaces: Defining Structures
In Python we use TypedDict or @dataclass. In TypeScript, we use interfaces.
Modeling a Vulnerability
# Python - with TypedDict
from typing import TypedDict, Optional, Literal

class Vulnerability(TypedDict):
    id: str
    severity: Literal["critical", "high", "medium", "low"]
    target: str
    description: str
    remediation: Optional[str]  # Optional field

# Using the definition
vuln: Vulnerability = {
    "id": "CVE-2024-1234",
    "severity": "high",
    "target": "https://example.com/login",
    "description": "SQL Injection in login form",
    # remediation is optional
}
// TypeScript - with interface
interface Vulnerability {
id: string;
severity: "critical" | "high" | "medium" | "low"; // Union type
target: string;
description: string;
remediation?: string; // The ? indicates optional
}
// Using the definition
const vuln: Vulnerability = {
id: "CVE-2024-1234",
severity: "high",
target: "https://example.com/login",
description: "SQL Injection in login form",
// remediation is optional
};Nested Interfaces for Nuclei Results
// Types for nuclei results
type Severity = "info" | "low" | "medium" | "high" | "critical";

interface TemplateInfo {
  name: string;
  author: string;
  severity: Severity;
  tags: string[];
  reference?: string[];
}

interface NucleiMatch {
  template: string;
  templateInfo: TemplateInfo; // Nested interface
  host: string;
  matched: string;
  timestamp: Date;
  extractedResults?: string[]; // Optional array
}

// Example usage
const result: NucleiMatch = {
  template: "cves/2024/CVE-2024-1234.yaml",
  templateInfo: {
    name: "CVE-2024-1234 - SQL Injection",
    author: "security-researcher",
    severity: "high",
    tags: ["sqli", "cve", "cve2024"],
  },
  host: "https://vulnerable-site.com",
  matched: "/api/login",
  timestamp: new Date(),
};
Classes: OOP in TypeScript
Access Modifiers
Python uses convention (prefix _). TypeScript has real modifiers enforced at compilation.
# Python - Everything is public by convention
class SecurityTool:
    def __init__(self, name: str, version: str):
        self.name = name           # Public
        self._version = version    # "Private" by convention
        self.__api_key = None      # Name mangling (not truly private)

    def get_info(self) -> str:
        return f"{self.name} v{self._version}"
// TypeScript - Real modifiers
class SecurityTool {
public name: string; // Accessible from anywhere
protected version: string; // Only class and subclasses
private apiKey?: string; // Only this class
constructor(name: string, version: string) {
this.name = name;
this.version = version;
}
getInfo(): string {
return `${this.name} v${this.version}`;
}
}
const tool = new SecurityTool("nuclei", "3.0.0");
console.log(tool.name); // ✅ Works
console.log(tool.version); // ❌ Error: 'version' is protected
console.log(tool.apiKey); // ❌ Error: 'apiKey' is privateConstructor Shorthand (Very Useful!)
TypeScript lets you declare AND assign properties in one line:
// Long form
class Tool {
  name: string;
  version: string;

  constructor(name: string, version: string) {
    this.name = name;
    this.version = version;
  }
}

// Short form - Much better!
class Tool {
  constructor(
    public name: string,
    public version: string,
    private binary: string
  ) {
    // Properties are created automatically!
  }
}
Abstract Classes
# Python - ABC
from abc import ABC, abstractmethod

class OffensiveTool(ABC):
    @property
    @abstractmethod
    def tool_name(self) -> str:
        pass

    @abstractmethod
    async def execute(self, target: str) -> str:
        pass

    def validate_target(self, target: str) -> bool:
        """Concrete method shared by all"""
        import re
        url_pattern = r'^https?://[^\s]+$'
        return bool(re.match(url_pattern, target))
// TypeScript - abstract class
abstract class OffensiveTool {
// Abstract properties
abstract readonly toolName: string;
abstract readonly description: string;
// Abstract method
abstract execute(target: string): Promise<string>;
// Concrete method shared by all
validateTarget(target: string): boolean {
const urlPattern = /^https?:\/\/[^\s]+$/;
return urlPattern.test(target);
}
}
// Implementation
class NucleiScanner extends OffensiveTool {
readonly toolName = "nuclei";
readonly description = "Fast vulnerability scanner";
async execute(target: string): Promise<string> {
if (!this.validateTarget(target)) {
throw new Error(`Invalid target: ${target}`);
}
// Simulate scan
return JSON.stringify({ target, vulnerabilities: 3 });
}
}Async/Await: The Most Important Pattern
The syntax is almost identical to Python. This is one reason why the transition is so natural.
Basic Comparison
# Python
import asyncio

async def scan_target(target: str) -> str:
    print(f"Scanning {target}...")
    await asyncio.sleep(1)  # Simulate async operation
    return f"Scan complete for {target}"

# Execute
async def main():
    result = await scan_target("https://example.com")
    print(result)

asyncio.run(main())
// TypeScript
async function scanTarget(target: string): Promise<string> {
console.log(`Scanning ${target}...`);
await new Promise(resolve => setTimeout(resolve, 1000));
return `Scan complete for ${target}`;
}
// Execute
async function main(): Promise<void> {
const result = await scanTarget("https://example.com");
console.log(result);
}
main();Running CLI Commands (Critical for Red Team!)
# Python - subprocess
import asyncio
import subprocess

async def run_command(command: str) -> dict:
    process = await asyncio.create_subprocess_shell(
        command,
        stdout=subprocess.PIPE,
        stderr=subprocess.PIPE
    )
    stdout, stderr = await process.communicate()

    return {
        "stdout": stdout.decode(),
        "stderr": stderr.decode(),
        "exit_code": process.returncode
    }

# Example: nuclei
result = await run_command("nuclei -u https://example.com -json")
// TypeScript - child_process
import { exec } from "child_process";
import { promisify } from "util";
const execAsync = promisify(exec);
interface CommandResult {
stdout: string;
stderr: string;
exitCode: number;
}
async function runCommand(command: string): Promise<CommandResult> {
try {
const { stdout, stderr } = await execAsync(command, {
timeout: 30000,
maxBuffer: 1024 * 1024,
});
return { stdout, stderr, exitCode: 0 };
} catch (error: unknown) {
const execError = error as {
stdout?: string;
stderr?: string;
code?: number;
};
return {
stdout: execError.stdout || "",
stderr: execError.stderr || String(error),
exitCode: execError.code || 1,
};
}
}
// Example: nuclei
const result = await runCommand("nuclei -u https://example.com -json");Parallel vs Sequential Execution
# Python - asyncio.gather for parallelism
async def parallel_scans():
    results = await asyncio.gather(
        scan_target("target1.com"),
        scan_target("target2.com"),
        scan_target("target3.com"),
    )
    return results
// TypeScript - Promise.all for parallelism
async function parallelScans(): Promise<string[]> {
const results = await Promise.all([
scanTarget("target1.com"),
scanTarget("target2.com"),
scanTarget("target3.com"),
]);
return results;
}
// Promise.allSettled - continues even if some fail
const results = await Promise.allSettled([
scanTarget("target1.com"), // Success
scanTarget("target2.com"), // Fails
scanTarget("target3.com"), // Success
]);
results.forEach((result, i) => {
if (result.status === "fulfilled") {
console.log(`Scan ${i}: ✅ ${result.value}`);
} else {
console.log(`Scan ${i}: ❌ ${result.reason}`);
}
});Error Handling
Custom Error Classes
# Python
class SecurityToolError(Exception):
    def __init__(self, message: str, tool_name: str, exit_code: int = None):
        super().__init__(message)
        self.tool_name = tool_name
        self.exit_code = exit_code

class TargetValidationError(Exception):
    def __init__(self, target: str, reason: str):
        super().__init__(f'Invalid target "{target}": {reason}')
        self.target = target
        self.reason = reason
// TypeScript
class SecurityToolError extends Error {
constructor(
message: string,
public toolName: string,
public exitCode?: number
) {
super(message);
this.name = "SecurityToolError";
}
}
class TargetValidationError extends Error {
constructor(
public target: string,
public reason: string
) {
super(`Invalid target "${target}": ${reason}`);
this.name = "TargetValidationError";
}
}The Result Pattern (Alternative to Exceptions)
This pattern, inspired by Rust, makes errors explicit in the return type.
// Define Result type
type Result<T, E = Error> =
  | { success: true; data: T }
  | { success: false; error: E };

// Helpers
function ok<T>(data: T): Result<T, never> {
  return { success: true, data };
}

function err<E>(error: E): Result<never, E> {
  return { success: false, error };
}

// Usage in target validation
function validateTarget(target: string): Result<string, TargetValidationError> {
  const allowedDomains = ["testsite.local", "lab.internal"];

  try {
    const url = new URL(target);
    const isAllowed = allowedDomains.some(
      d => url.hostname === d || url.hostname.endsWith(`.${d}`)
    );

    if (!isAllowed) {
      return err(new TargetValidationError(target, "Not in allowed list"));
    }
    return ok(target);
  } catch {
    return err(new TargetValidationError(target, "Invalid URL format"));
  }
}

// Caller MUST handle both cases
const result = validateTarget("https://evil.com");
if (result.success) {
  console.log(`Valid: ${result.data}`);
} else {
  console.log(`Invalid: ${result.error.reason}`);
}
Zod: Runtime Validation (Like Pydantic)
Zod is the most popular validation library in TypeScript. It’s similar to Pydantic in Python.
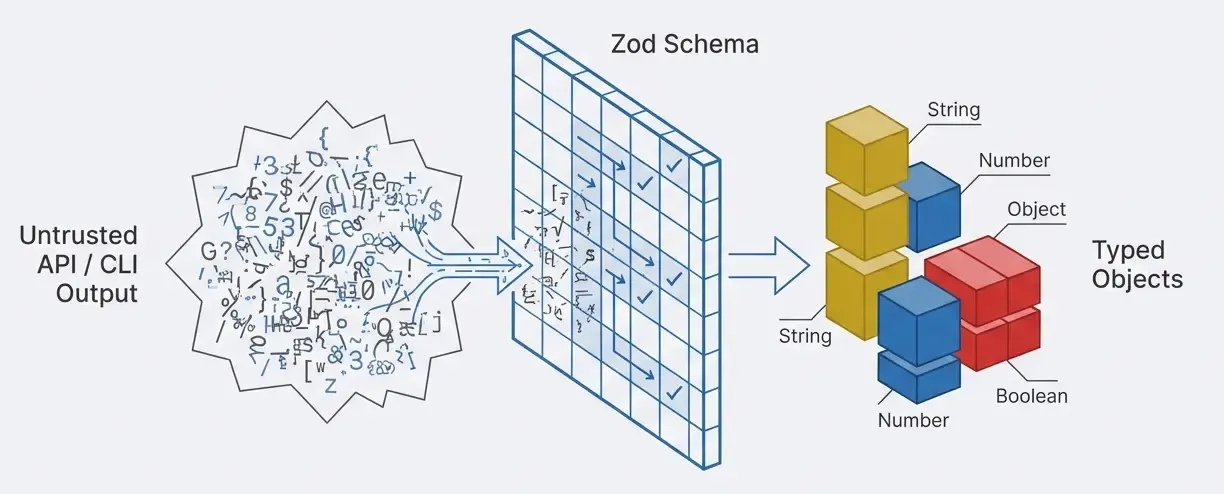
Why Do We Need Runtime Validation?
TypeScript types disappear after compilation. If you receive data from an API, CLI, or user, TypeScript can’t protect you.
import { z } from "zod";

// Define schema (like Pydantic models)
const NucleiOptionsSchema = z.object({
  target: z.string().url("Must be a valid URL"),

  severity: z
    .array(z.enum(["info", "low", "medium", "high", "critical"]))
    .optional(),

  rateLimit: z.number().min(1).max(1000).default(150),

  timeout: z.number().positive().default(30),
});

// Extract TypeScript type from schema 🎉
type NucleiOptions = z.infer<typeof NucleiOptionsSchema>;

// Validate data at runtime
const rawInput = { target: "https://example.com", severity: ["high"] };
const result = NucleiOptionsSchema.safeParse(rawInput);

if (result.success) {
  // result.data has type NucleiOptions
  console.log(
    `Scanning ${result.data.target} with rate limit ${result.data.rateLimit}`
  );
} else {
  console.log("Validation failed:", result.error.errors);
}
Zod vs Pydantic
# Python - Pydantic
from pydantic import BaseModel, Field
from typing import Optional
from enum import Enum

class Severity(str, Enum):
    info = "info"
    low = "low"
    medium = "medium"
    high = "high"
    critical = "critical"

class NucleiOptions(BaseModel):
    target: str = Field(..., pattern=r'^https?://')
    severity: Optional[list[Severity]] = None
    rate_limit: int = Field(default=150, ge=1, le=1000)
    timeout: int = Field(default=30, gt=0)

# Validate
options = NucleiOptions(target="https://example.com", severity=["high"])
// TypeScript - Zod
import { z } from "zod";
const NucleiOptionsSchema = z.object({
target: z.string().url(),
severity: z
.array(z.enum(["info", "low", "medium", "high", "critical"]))
.optional(),
rateLimit: z.number().min(1).max(1000).default(150),
timeout: z.number().positive().default(30),
});
type NucleiOptions = z.infer<typeof NucleiOptionsSchema>;
// Validate
const options = NucleiOptionsSchema.parse({
target: "https://example.com",
severity: ["high"],
});Module System
Python vs TypeScript
# Python - __init__.py and imports
# src/types/__init__.py
from .vulnerability import Vulnerability, Severity
from .scan_result import ScanResult

# src/tools/__init__.py
from .nuclei import scan_with_nuclei
from .nmap import scan_with_nmap

# main.py
from src.types import Vulnerability, ScanResult
from src.tools import scan_with_nuclei, scan_with_nmap
// TypeScript - index.ts (barrel exports)
// src/types/index.ts
export { Vulnerability, Severity } from "./vulnerability.js";
export { ScanResult } from "./scanResult.js";
// src/tools/index.ts
export { scanWithNuclei } from "./nuclei.js";
export { scanWithNmap } from "./nmap.js";
// main.ts
import { Vulnerability, ScanResult } from "./types/index.js";
import { scanWithNuclei, scanWithNmap } from "./tools/index.js";Advanced Patterns for Security Tools
Rate Limiter
class RateLimiter {
  private requests: number[] = [];

  constructor(
    private maxRequests: number,
    private windowMs: number
  ) {}

  canMakeRequest(): boolean {
    const now = Date.now();
    this.requests = this.requests.filter(t => t > now - this.windowMs);
    return this.requests.length < this.maxRequests;
  }

  recordRequest(): boolean {
    if (!this.canMakeRequest()) return false;
    this.requests.push(Date.now());
    return true;
  }
}

// Usage
const limiter = new RateLimiter(100, 60000); // 100 req/min
if (limiter.recordRequest()) {
  await runScan(target);
} else {
  console.log("Rate limit exceeded");
}
Audit Logger
interface AuditEntry {
  id: string;
  timestamp: Date;
  action: "tool_invoked" | "scan_started" | "scan_completed";
  tool?: string;
  target?: string;
  user?: string;
  result?: "success" | "failure";
}

class AuditLogger {
  private entries: AuditEntry[] = [];

  log(action: AuditEntry["action"], details: Partial<AuditEntry>): void {
    const entry: AuditEntry = {
      id: `audit-${Date.now()}`,
      timestamp: new Date(),
      action,
      ...details,
    };
    this.entries.push(entry);
    console.error("[AUDIT]", JSON.stringify(entry));
  }
}

// Usage
const audit = new AuditLogger();
audit.log("scan_started", {
  tool: "nuclei",
  target: "https://test.local",
  user: "claude",
});
Best Practices
1. Use strict: true in tsconfig.json
{
  "compilerOptions": {
    "strict": true,
    "noImplicitAny": true,
    "strictNullChecks": true
  }
}
2. Avoid any - Use unknown
// ❌ Bad
function process(data: any): void {
  console.log(data.name); // No verification
}

// ✅ Good
function process(data: unknown): void {
  if (typeof data === "object" && data !== null && "name" in data) {
    console.log((data as { name: string }).name);
  }
}
3. Use Nullish Coalescing and Optional Chaining
// Nullish coalescing (??) - only uses default if null/undefined
const port = userPort ?? 443;

// Optional chaining (?.) - safe access to nested properties
const userName = response?.data?.user?.name ?? "Anonymous";
4. Literal Types with as const
const SEVERITIES = ["info", "low", "medium", "high", "critical"] as const;
type Severity = (typeof SEVERITIES)[number]; // "info" | "low" | ...
Essential Libraries
| Library | Use Case | Python Equivalent |
|---|---|---|
| zod | Runtime validation | pydantic |
| winston | Structured logging | logging + structlog |
| chalk | Terminal colors | colorama + rich |
| commander | CLI parsing | argparse + click |
| execa | Execute commands | subprocess |
| p-limit | Limited concurrency | asyncio.Semaphore |
| nanoid | Unique IDs | uuid + secrets |
Conclusion
TypeScript is an excellent choice for Python developers who want to:
- Develop for JavaScript/Node ecosystems (MCP, Electron, extensions)
- Stricter types than Python’s optional type hints
- Dual validation (compilation + runtime with Zod)
- V8 native performance for CLI tools
The learning curve is gentle if you already know:
- Python type hints
- Async/await
- Classes and OOP
- Error handling
Next step: build an MCP server that lets any LLM execute security tools. Stay tuned!
Resources
About this series: This article is part of a learning project building an MCP server for red team tools. Future posts will cover the complete redteam-mcp implementation with nuclei and nmap.